
Our Blog

Is the Septic Tank Cleaning Cost Worth It? A Guide for Glendale Homeowners
July 8, 2025
Septic tanks aren’t the most exciting part of owning a home. Most people don’t think about theirs until something smells bad, backs up, or stops working. But the truth is, ignoring your septic system can cost you a lot more in the long run. In the Glendale area, where many homes still use septic systems, regular maintenance is important. Wondering if the septic tank cleaning cost is worth it? Yes,... Read more »

How to Handle a Burst Pipe Emergency During the Holiday Season
December 10, 2024
The holiday season is full of joy, laughter, and togetherness—but imagine this: as you’re preparing a festive feast, water starts pooling on the kitchen floor. A burst pipe can quickly turn holiday cheer into holiday chaos. According to the Insurance Information Institute, Burst pipes account for nearly 25% of all property damage claims annually. Handling a plumbing disaster during the busiest time of the year can feel overwhelming, but the... Read more »

Top 5 Plumbing Emergencies That Require an Immediate 24/7 Plumber
October 10, 2024
Water damage is no joke. Did you know that even a small leak can cost homeowners thousands of dollars in repairs? According to the Insurance Information Institute, water damage claims are among the most common insurance claims in the U.S., accounting for roughly 24% of all claims. Now, imagine a plumbing emergency that’s not small—a burst pipe or an overflowing toilet in the middle of the night. It’s a nightmare.... Read more »
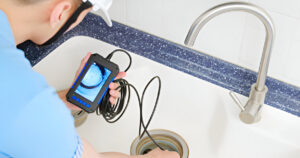
5 Benefits of Camera Sewer Inspection For Home Buyers
August 22, 2024
When purchasing a house, it is important to steer clear of any undisclosed problems that may result in significant expenses. One important aspect to examine is the plumbing system, and employing a camera sewer inspection can be extremely beneficial. This inspection offers a transparent assessment of the sewer lines' status, potentially identifying issues overlooked in a typical home inspection. Here’s a closer look at how a camera sewer inspection can... Read more »
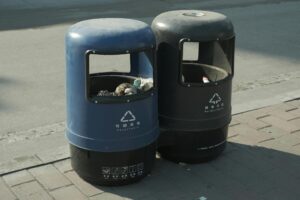
How Long Do Garbage Disposals Last?
June 27, 2024
During the busy daily kitchen routines, the garbage disposal is frequently ignored until it malfunctions. Whether you are cleaning plates after a family meal or washing vegetables for a salad, this overlooked appliance is essential for maintaining the cleanliness and efficiency of our kitchens. However, similar to all machines, garbage disposals have a limited duration of use. Understanding how long do garbage disposals last and how to maintain them can... Read more »

Why Do I Have Low Water Pressure in My Kitchen Sink?
June 15, 2024
Experiencing low water pressure in your kitchen sink can be incredibly frustrating, particularly when you're cooking, washing dishes, or simply trying to fill a glass of water promptly. Identifying the root cause of this issue is essential for resolving it effectively. In this blog, we'll explore the common reasons behind low water pressure in kitchen sinks and what you can do about them. Why Water Pressure Matters Water pressure is... Read more »
4 Steps to Take to Avoid Needing Emergency Plumbing Services During the Holidays
December 14, 2023
The holiday season is a time of joy, celebration, and creating lasting memories with loved ones. However, nothing can dampen the festive spirit faster than a plumbing emergency. The last thing anyone wants is to deal with burst pipes, clogged drains, or leaks during a time meant for merriment. To safeguard your home and ensure a stress-free holiday season, it's crucial to take proactive measures to prevent plumbing disasters. In... Read more »

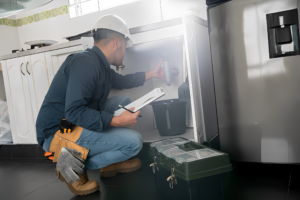
Dishwasher Not Draining? 4 Common Causes
October 10, 2023
The modern dishwasher is a true marvel of convenience, saving us countless hours of scrubbing and soaking dishes by hand. However, when your dishwasher decides not to cooperate and leaves a pool of murky water at the bottom of your machine, it can be both frustrating and baffling. What could be causing this issue? In this blog, we will explore four common causes of a dishwasher not draining and provide... Read more »

When Should I Call an Emergency Plumber?
March 16, 2023
As a homeowner, you take pride in keeping your home in tip-top shape. But no matter how hard you try, there's always the chance that something will go wrong – and when it does, it can be a major headache. One of the most common home emergencies is plumbing problems. From burst pipes to clogged drains, plumbing issues can be frustrating, messy, and even dangerous. But when should you call... Read more »
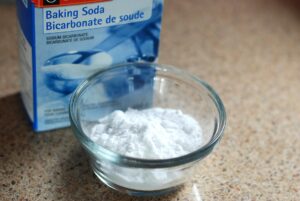
Clogged Drain Baking Soda Fix: How to Clear Your Drain Safely
July 14, 2022
Whether it's clogged drains, backed-up sinks, or a flooded basement, we all have had to deal with some kind of drain blockage that won't go away. In this article, learn how to fix these issues safely and effectively by using a few simple ingredients and items in your kitchen cabinet. How Does Baking Soda Unclog a Drain? Baking soda is a kitchen staple that can work wonders to clean drains... Read more »
Proudly Serving Arizona Since 2001Apache Junction Avondale Buckeye Cave Creek Chandler El Mirage Gilbert Glendale Goodyear Mesa Peoria Phoenix Scottsdale Surprise Tempe
- Anthem
- Back
- Apache Junction
- Back
- Gilbert
- Back
- Mesa