
Our Blog

How to Fix Hard Water: Effective Solutions and Tips
September 21, 2024
It may surprise you to learn how typical hard water is. Hard water is a regular problem for an estimated 85% of American houses. Hard water is probably to blame if you've ever noticed chalky residue on your dishes after running the dishwasher or had dry skin that doesn't go away no matter how much moisturizer you apply. However, there’s no need to worry! Even though hard water can be... Read more »
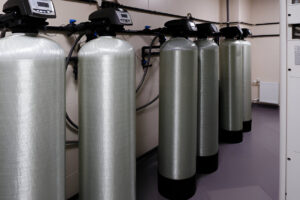
How Big of a Water Softener Do I Need
September 10, 2024
According to the U.S Geological Survey (USGS), over 85% of American households have hard water, which can cause scaling, mineral accumulation, and expensive appliance repairs. An appropriately sized water softener can help avoid these issues, reduce salt usage, and improve water quality. But how big of a water softener do I need for my home? In this blog post, we will guide you through the process of selecting the appropriate... Read more »

Water Conditioner vs. Water Softener: What’s the Difference?
May 16, 2024
Good water quality plays a significant role in keeping our lives running smoothly. Ever notice those crusty white deposits on your faucets or struggle with soap that just won't lather properly? That's often a sign of hard water caused by minerals like calcium and magnesium. Thankfully, there are solutions, like water conditioners and softeners. They might sound similar, but they each have their own way of tackling complex water problems.... Read more »
What’s the Best Water Conditioner for Your Home?
March 29, 2024
Water is essential for life, but not all water is created equal. If you've been experiencing issues like limescale buildup, strange tastes, or foul odors in your tap water, you might be considering investing in a water treatment system. But with so many options available, how do you know which one is the best water conditioner for your home? In this guide, we'll explore the world of water conditioners, helping... Read more »
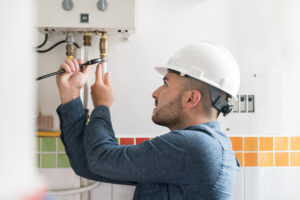
How to Maintain a Water Heater?
September 19, 2022
If you are one of the many people who needs to maintain your water heater, you may have some enlightening questions to ask yourself, such as "how to maintain a water heater?" If so, you aren't alone! There are many parts to a water heater that requires maintenance, so if you are not sure how to keep your water heater running and what steps to take, this article can help.... Read more »
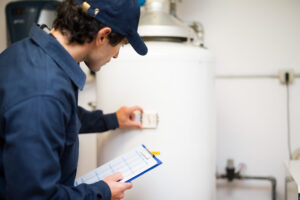
Leaning Water Heater: Is a Tilted Tank Dangerous?
August 25, 2022
Why is a leaning water heater a safety problem? Think about it for a second: you have a large standing tank with water heating up to 100 degrees Fahrenheit. Imagine that your leaning water heater becomes tilted, slowly moving toward the floor, so most of the water is at the bottom. Would your heating system still function as intended? Let's find out more! Why Is A Leaning Water Heater A... Read more »

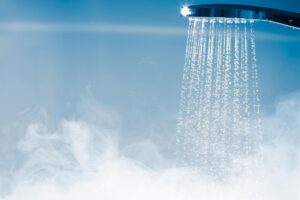
5 Reasons Your Hot Water Runs Out Fast
April 20, 2022
When your hot water runs out fast, you might be able to find a solution. Here are a few reasons it could be happening. A hot shower can be both therapeutic and a way to naturally clean yourself. Once hot water runs out, a burst of cold water can shock you. When you're a busy homeowner, you always want an easy solution for long hot showers. A variety of factors... Read more »

Why Is My Water Softener Leaking? Solutions for Some Common Scenarios
March 31, 2022
If you notice your water softener leaking, you don’t need to panic, but you should fix it as soon as possible. In this article, I talk about some of the most common scenarios as well as some solutions that you can try on your own before contacting a plumber. Important note: before trying to figure out where the water is coming from, disconnect the water softener’s power supply. Always remember,... Read more »

How to Find a Water Leak Inside a Wall: 5 Steps to Take ASAP to Prevent More Damage
March 5, 2022
Want to protect your home from water damage? In this article, we discuss how to find a water leak inside a wall so you can prevent a costly repair. When leaks go undetected for a long time, they can cause substantial damage to your home and your belongings. From crumbling drywall and bubbling paint, to rotting flooring, to mold infestation, the problems that come with a leak inside the walls... Read more »

Hard Water Treatment: 5 Reasons to Install a Water Softening System
September 24, 2021
Thinking of adding a hard water treatment system to your plumbing? Get more information about why you should in this article. You have scrubbed the deposits from your sink, felt the residue on your skin, replaced your shower head more times than you can remember—maybe it’s time to install a water softener. If you are tired of dealing with the effects of hard water, this solution is pretty easy to... Read more »
Proudly Serving Arizona Since 2001Apache Junction Avondale Buckeye Cave Creek Chandler El Mirage Gilbert Glendale Goodyear Mesa Peoria Phoenix Scottsdale Surprise Tempe
- Anthem
- Back
- Apache Junction
- Back
- Gilbert
- Back
- Mesa